How To: Safely compress springs during repair and maintenance of vehicle suspension units
1st May 2019

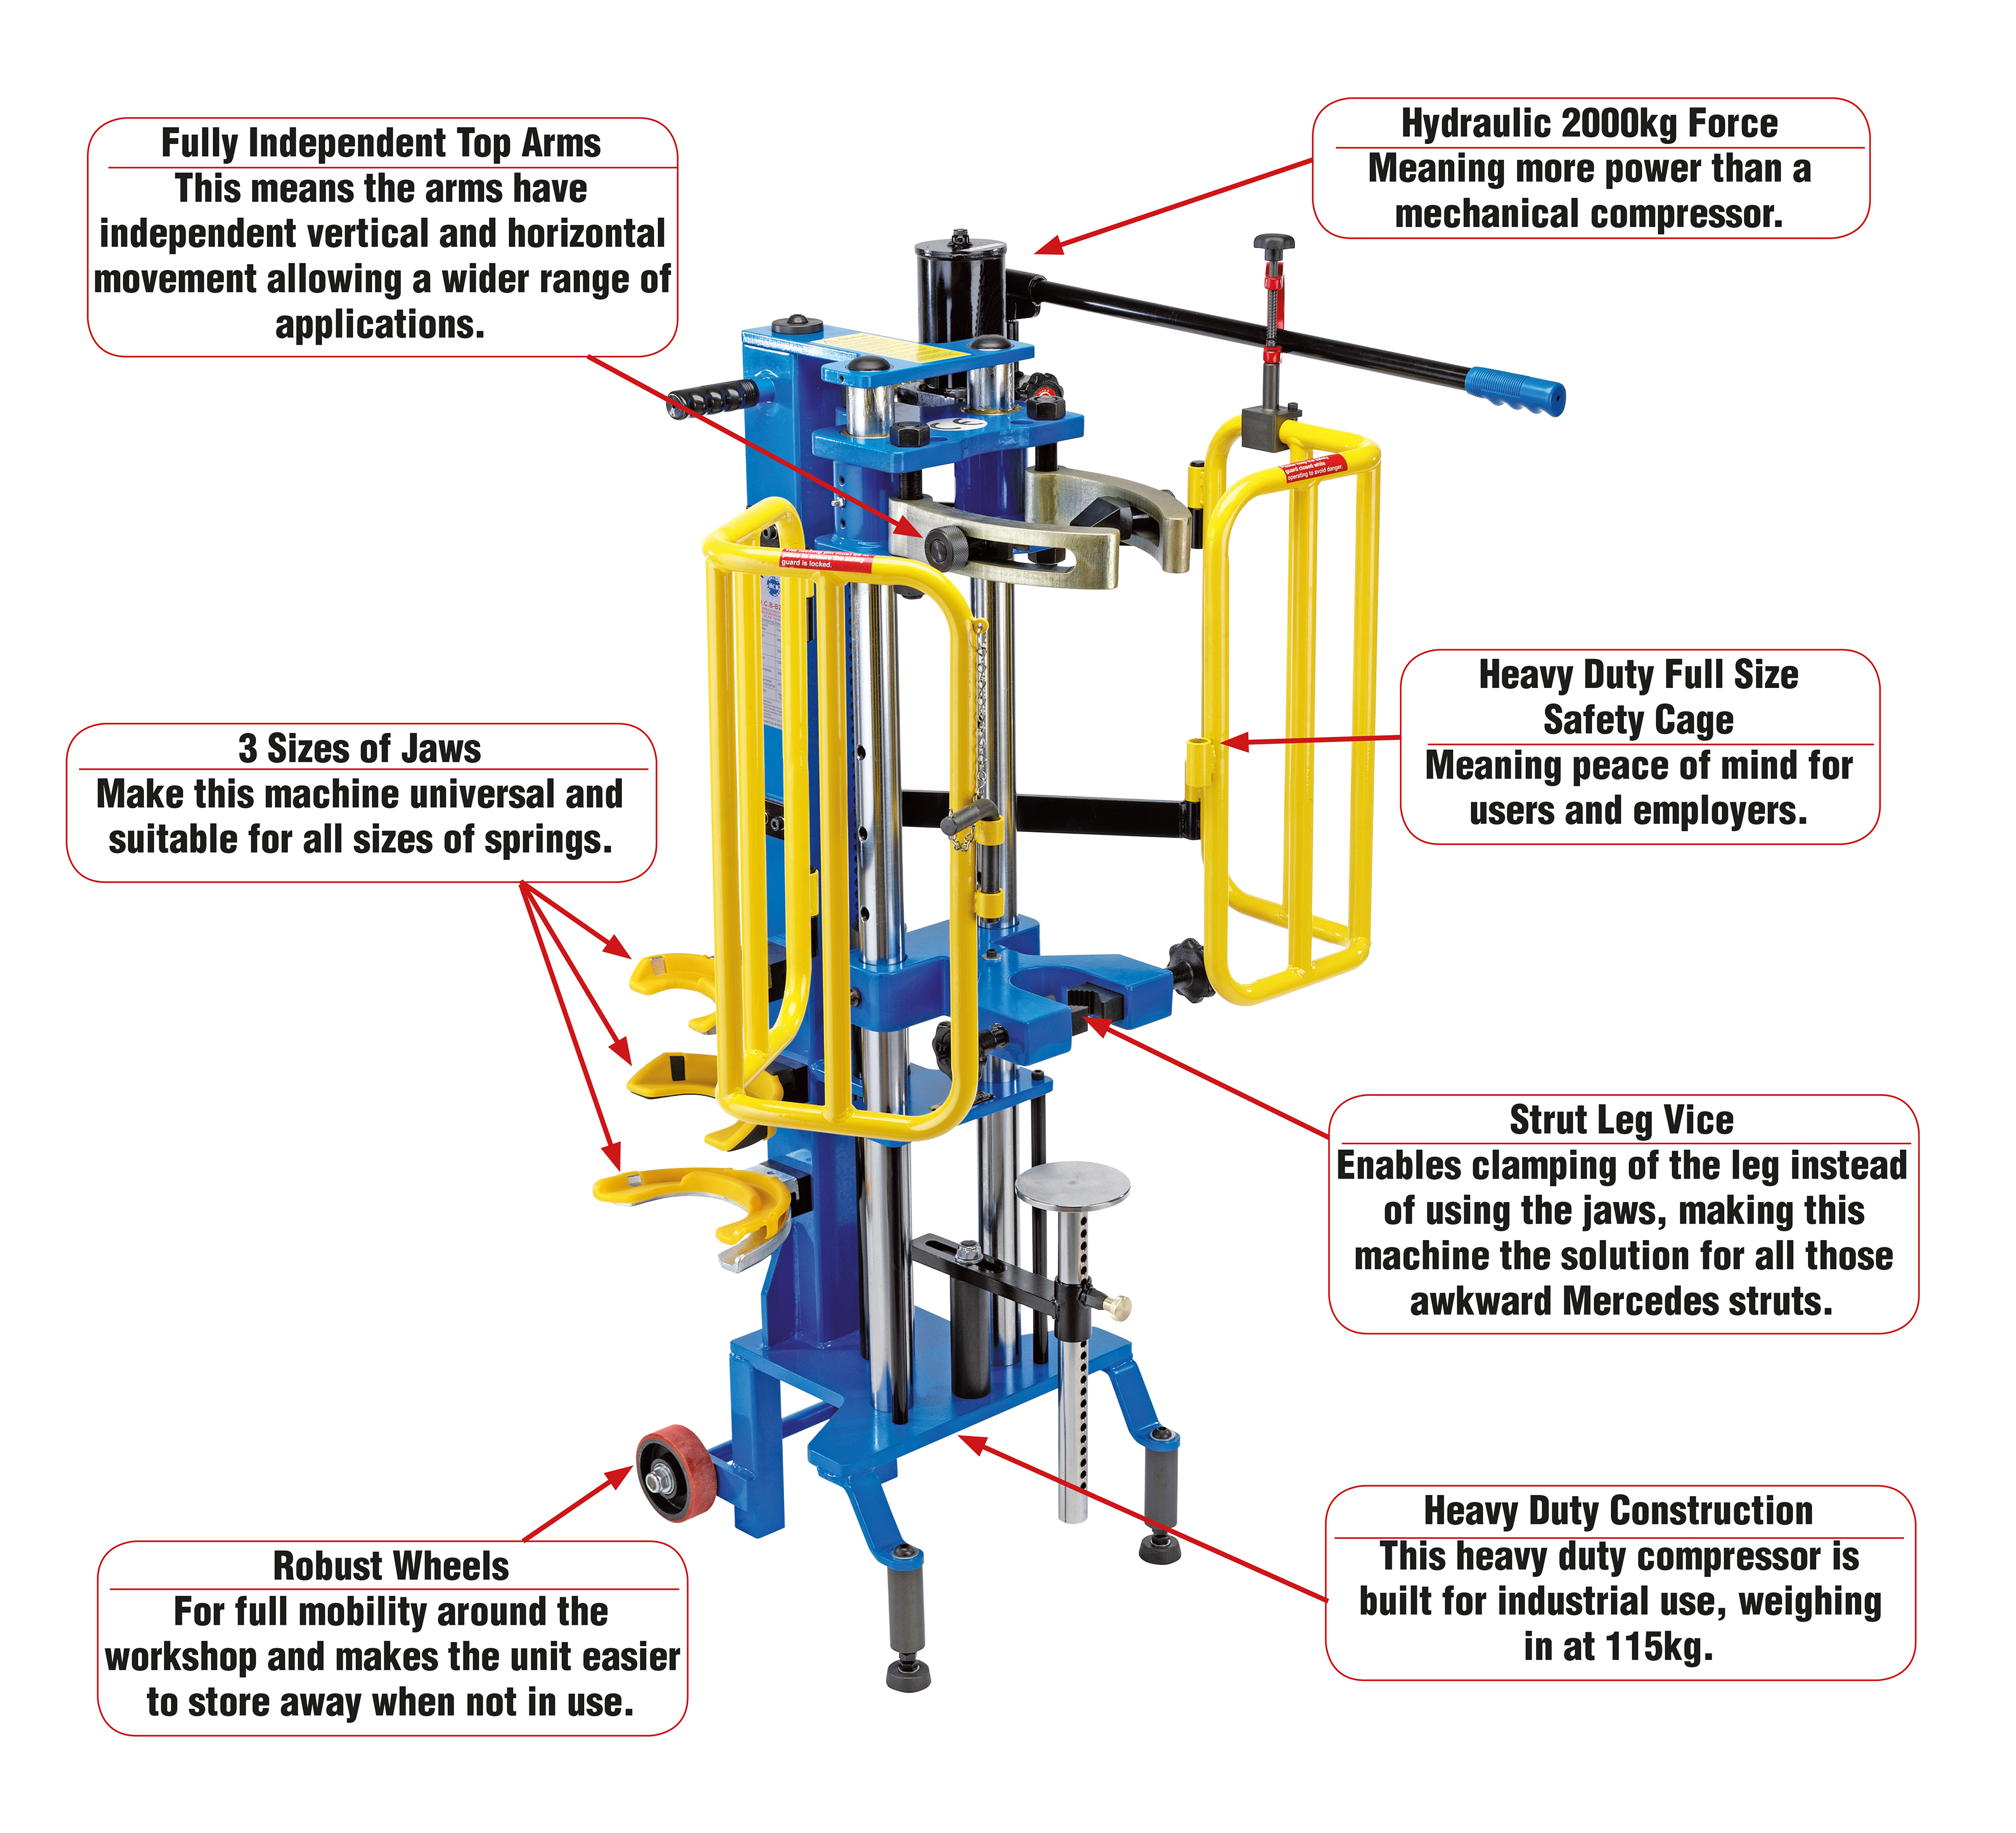
Introducing The Draper Expert Hydraulic Spring Compressor (56191)
This is an industrial machine offering garages a ‘total solution’ for all springs, including all Mercedes model springs, without the need for expensive adaptors. Its all-steel construction securely clamps and easily compresses a multitude of coil springs for safe and speedy dismantling of suspension units.
What can you use the Draper Expert Hydraulic Spring Compressor for?
• Linear springs - standard straight springs, constant stiffness.
• Progressive springs – to gain stiffness as they compress.
• Side load springs (aka banana springs) – eases force on the strut.
• Mini block - compact and progressive.
This spring compressor covers all springs!
Here are few helpful steps on using this workshop essential:
Before you start
The Hydraulic Spring Compressor does not require assembly, however there are a few parts which, depending on the job, will need to be fitted before use. These are: three different sizes of Yoke, a 30-70mm fixing jaw and a hydraulic pump handle.
Important
• Always ensure the safety guard is closed before operating the compressor.
• Stand in front of the compressor when using it, keeping your hands away from the fixing base and shock absorber.
• Always lock the pump handle when it’s not in use.
• Always keep the upper fixing base lubricated to prevent over-wearing of the copper sleeves.
• Ensue the compressor is stable and on a flat, level surface able to support the weight of the unit.
• Adjust the height of the lower fixing base according to the type or size of the shock absorber.
• Select the lower fixing jaw or lower fixing bracket according to the type or size of the shock absorber.
• If using the lower fixing jaw, refer to the vehicle manufacturer for the correct locking position.
• Only qualified mechanics should operate the compressor and only after they have read and understood the instruction manual.
How to operate the Spring Compressor
Step 1: If you’re using a fixing yoke, put the lower section of the shock absorber spring on the fixing yoke and rotate the shock absorber so that the spring can be held as low as possible.
Step 2: Ensure all of the bolts of the fixing yoke have been tightened.
Step 3: Push the adjustable lower supporting base up to the bottom of the shock absorber to support the base of the shock absorber.
Step 4: Adjust the upper fixing jaw according to the size of the shock absorber and spring. Ensure all bolts are tight.
Step 5: Close and lock the safety gate.
Step 6: Before compressing, check that the shock absorber and spring are secure. Then use the hand pump to compress the spring.
Step 7: To release the compressed spring, gradually release the pressure by turning the pressure knob anti-clock-wise.
Tips for safe working
Safety first: Draper Tools recommends you read and understand the owner’s manual and all the labels affixed to the compressor.
Sensible use: Never compress the spring so much so the coils touch. And, make sure you don’t leave a compressed spring unattended or compress the spring for a long period.
Keep it clean: Cluttered areas and benches invite accidents. Ensure that your work area is always clear of any hazards.
Wear proper clothing: Do not wear loose clothing or jewellery that could catch in compressor’s parts. Draper Tools recommends nonslip footwear and suggests rolling long sleeves above the elbow.
Personal Protection: Wear CE approved safety goggles at all times when using the compressor. https://www.drapertools.com/product/51130/Professional-Safety-Goggles
Click here to see more information on the Hydraulic Spring Compressor https://www.drapertools.com/product/56191